Not all NUC's are created equal

We have been blessed by the amount of wisdom, advice, and care shown by our community of beekeepers. So, I thought I would share a few pictures related to our bees in the hope the someone would find it at least a bit informative.

We picked up seven NUC’s from our favorite bee supply store (Texas Bee Supply in Blue Ridge) Everything looked great in six of them, but one of them didn’t seem quite right.

Why you ask?

Well, it didn’t have as many worker bees as the others and we couldn’t find the queen. Now it’s an unmarked queen, so we assumed that she was in there and we just couldn’t see her.

So, we checked again my lovely wife and I looked over every frame and couldn’t see her at all. We spotted all of the other queens without too much difficulty.

We contacted Texas Bee Supply to take advantage of the 30 day guarantee on these NUC’s and got the ball rolling for a replacement. They asked us to take some pictures, so I’m going to share them with you here.

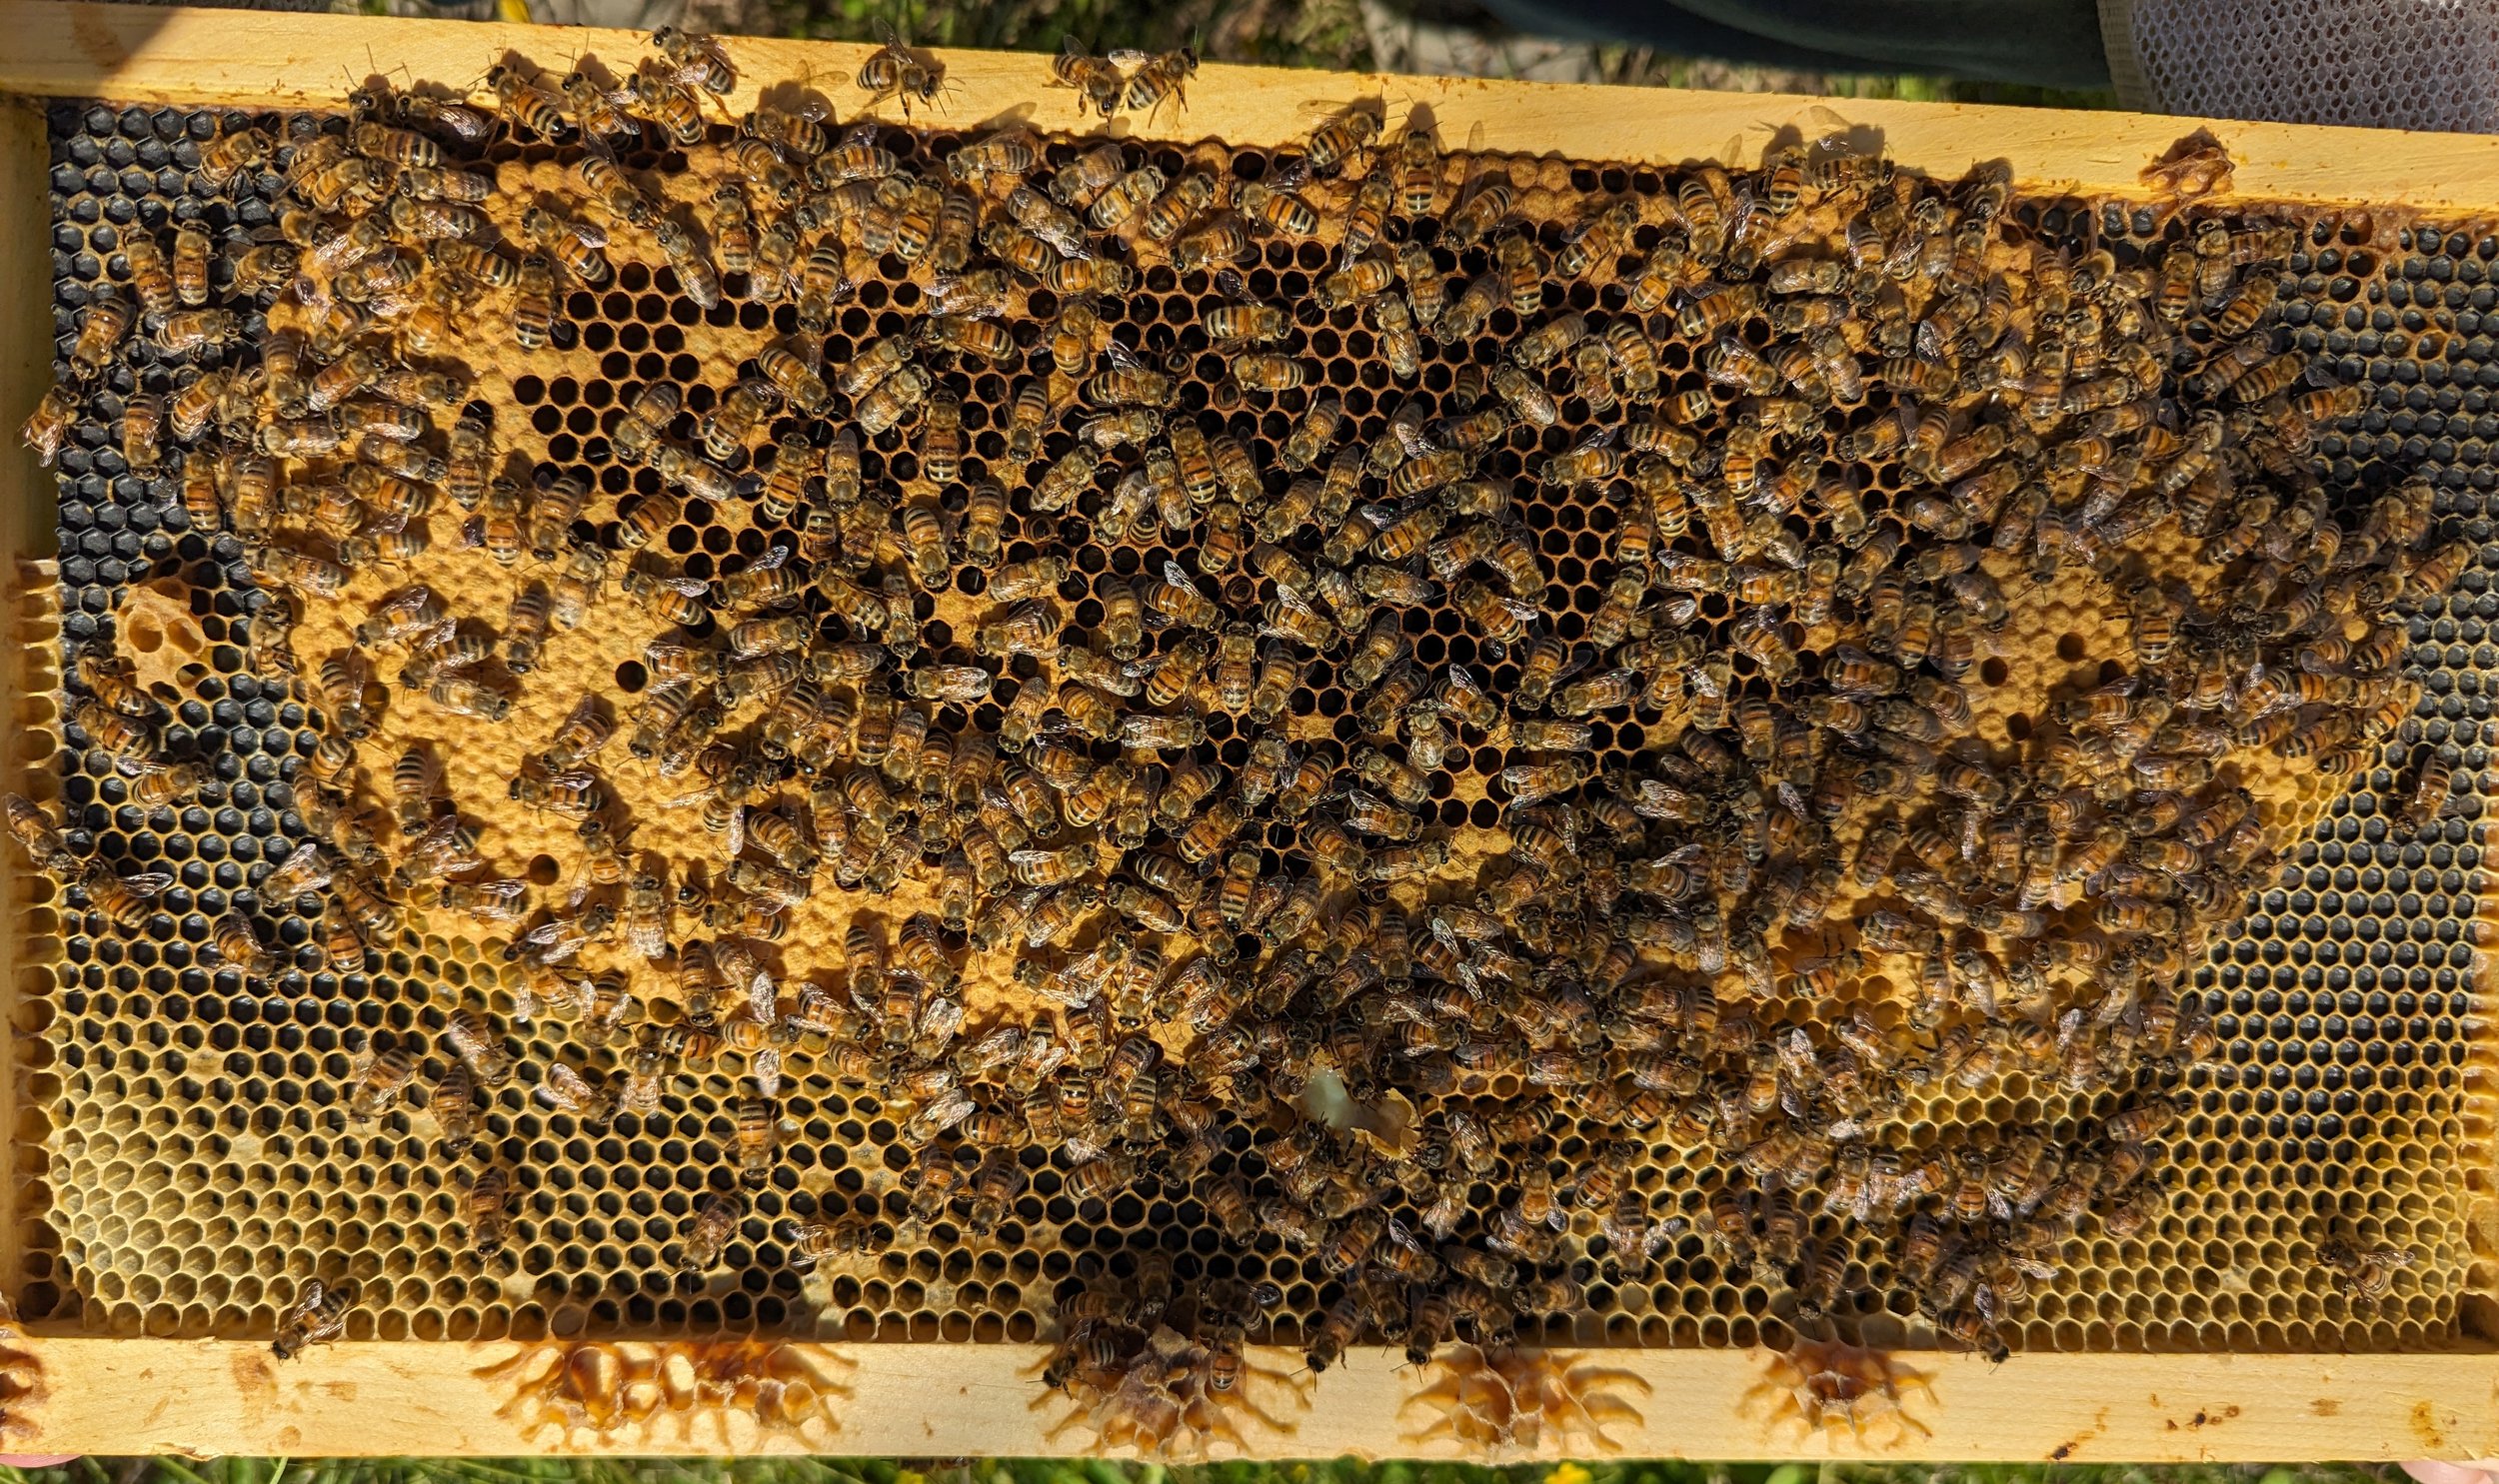
This is the top view with all five frames from the NUC, the extra three frames we provided, a beetle trap and a one gallon feeder. We put feeders in all of our new hives to help them build out wax on the new frames and to support them as they get settled in their new home.

 
Frame of bees with brood

You can see the capped brood on this frame. You can’t see in this photo, but there are also some larvae maturing in some of the cells. However, there are also a number of interior cells with liquid. We don’t see them using cells in the middle of brood to store liquid in healthy hives. It’s possible, but we’ve never seen it. Much more common for them to store some honey & pollen around the edges of the brood patch.

When we first looked at this frame, we saw some brood. We initially gave a “Hooray!” as we assumed there was a queen laying eggs. However, upon closer inspection the brood were maturing nicely. We couldn’t spot any actual eggs. Admitted that spotting eggs can be tricky.

It takes about nine days from the egg being laid until they cap the brood. So, at this point we figured that it was possible that this hive doesn’t have a queen.

This shows the # of days across the top and the lifecycle for Worker, Drone, and queen.

 
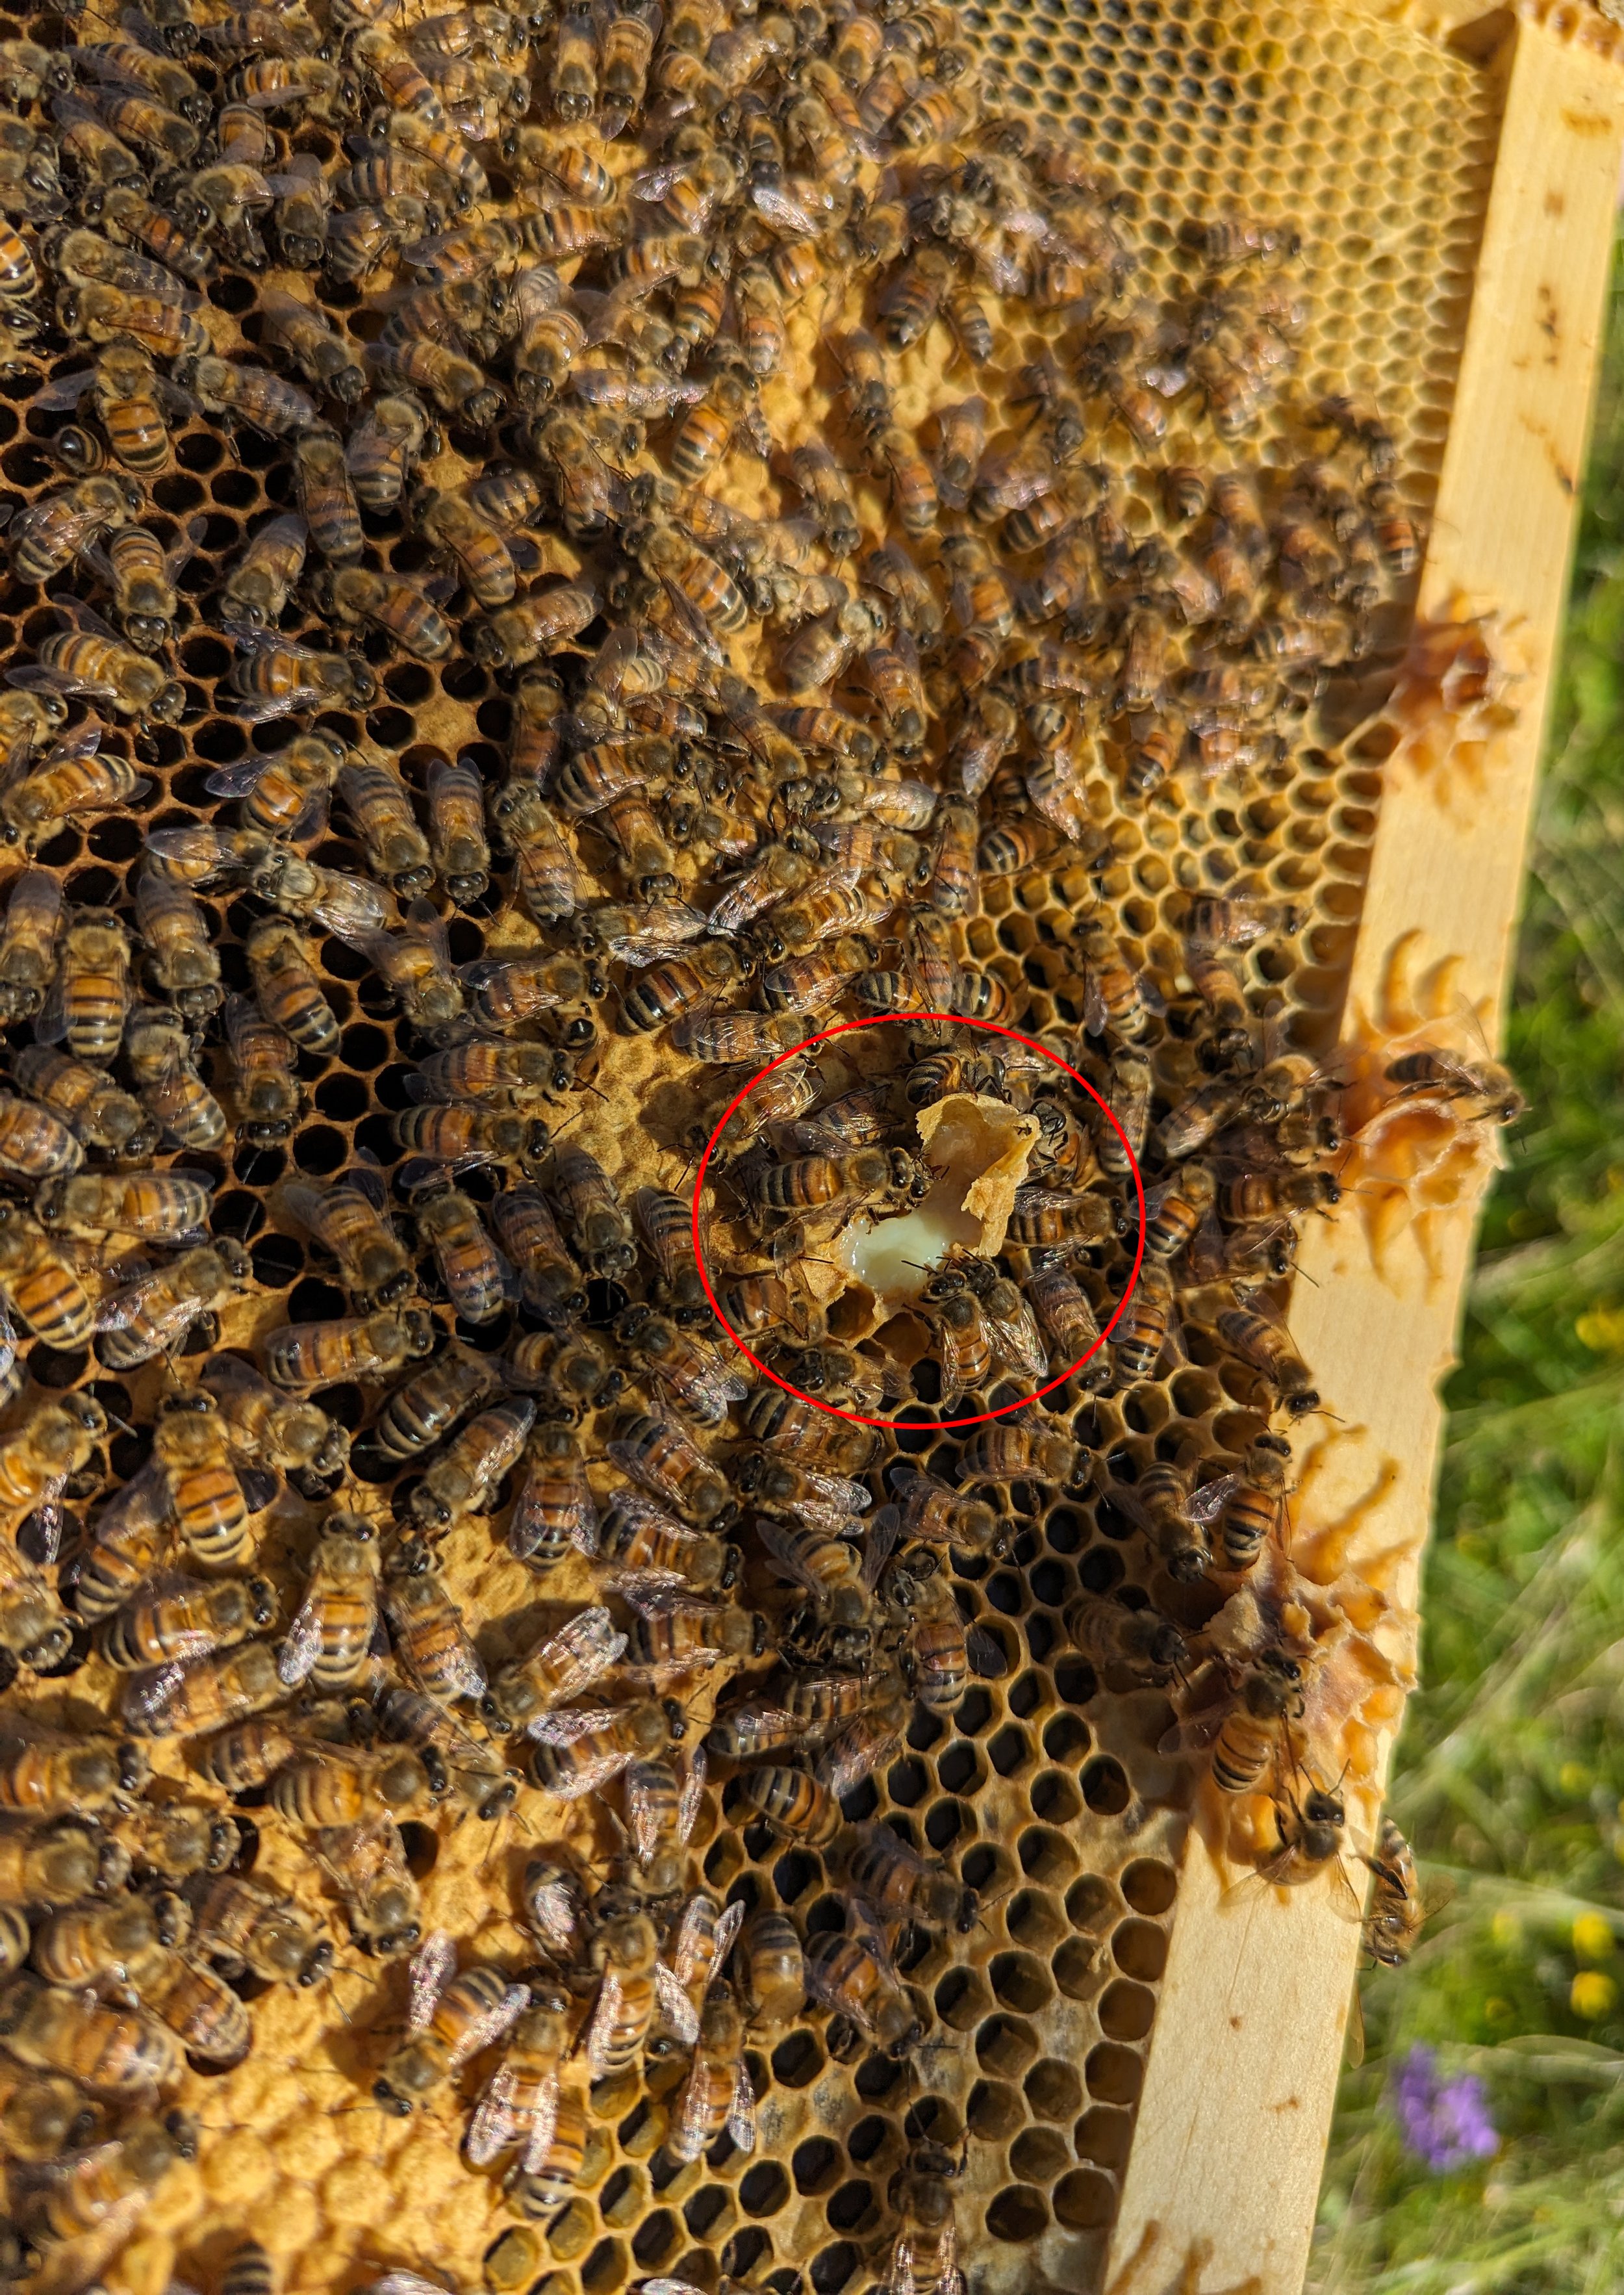
Bee Frame with broken queen cell circled

In the picture above, you can see some capped brood. More importantly, we found a queen cell with workers going in and out. We broke it open and they were trying to raise a queen. Other than not finding the queen, seeing them attempting to requeen was a solid indicator that they are queen less.

 
Three queen cells broken open

This picture shows a cluster of three queen cells and they were working all three of them. Another good indicator that they are missing a queen.

Instant Pot Spiced Rice

This rice is the perfect thing to pair with curry, stir-fry, or anything else your heart desires! It is a simple way to spice up your rice and add that extra bit of flavor to take your meals to the next level.

Ingredients

4 cups Basmati rice

4 1/2 cups water

2 tbsp Ghee

1st drop of spices

1 cinnamon stick

3 cardamom pods

3 green cardamom pods

1/2 tbsp whole peppercorns

1/s tbsp coriander seeds

2nd drop of spices

1 full bay leaf

1/2 tbsp coriander

1/2 tsp black mustard seeds

1/2 tsp white mustard seeds

1/2 tsp cumin seeds

Instructions

  1. Get 2 small bowls and measure the amounts needed for the 1st drop of spices in one, and the second drop of spices in the other.

  2. Turn the Instant Pot on high and put in the ghee, heating until melted.

  3. Put in your first drop of spices and let it sizzle in the ghee

  4. Once all of the green cardamom pods pop, add in your second drop of spices.

  5. Once the mustard seeds start to pop, dump in the rice. Stir to allow the spices to mix into rice evenly.

  6. Fry the rice with the spices, continuing to stir until it starts to look off-color (about 3-5 minutes).

  7. Pour in the water, then put the Instant Pot in rice mode and turn on Steam. Once it beeps, release the pressure and turn on “keep warm” if desired.

Basic Leg of Lamb

Ingredients

1 (4 to 5 pound) bone-in leg of lamb

4 cloves minced garlic

1 tablespoon olive oil

1 tablespoon chopped fresh rosemary (can substitute 1 tsp dried)

1 tablespoon chopped fresh thyme leaves (can substitute 1 tsp dried)

1 tablespoon Dijon mustard (sounds strange, but trust me)

1 tablespoon kosher salt

2 teaspoons ground black pepper


Directions

  1. Remove thawed lamb from refrigerator ~30 minutes prior to placing in oven. The best way to thaw is to place in the fridge 48 hours prior. The USDA gives two other methods, but the fridge is your best bet.

  2. Preheat oven to 325 degrees

  3. Pat lamb dry and score the top of the leg.

  4. In small bowl combine everything, but the lamb.

  5. Line a baking pan with foil

  6. Rub the mixed ingredients over the entire leg, being sure to get it into the scored portion

  7. Place in oven and roast until it reaches the desired doneness. How long should it be in the oven you ask?

    • Rare: About 15 minutes per pound or until internal temperature registers 125 degrees F.

    • Medium-Rare: About 20 minutes per pound or until internal temperature registers 130°F to 135°F

    • Medium: About 25 minutes per pound or until internal temperature registers 135°F to 140°F

    • Well-Done: About 30 minutes per pound or until internal temperature registers 155°F to 165°F

  8. Let rest 15 minutes with a foil tent over it to maintain temperature. The internal temperature will continue to go up while you rest it.

  9. Carve the leg and place on warmed plate to maintain temperature, and enjoy immediately. (Good post on how to carve your leg.)